
You don’t need coding to use Zapier fax integration. All you need to do is to set up a Zap. Let’s use iFax and Gmail as an example.
Setting up the trigger
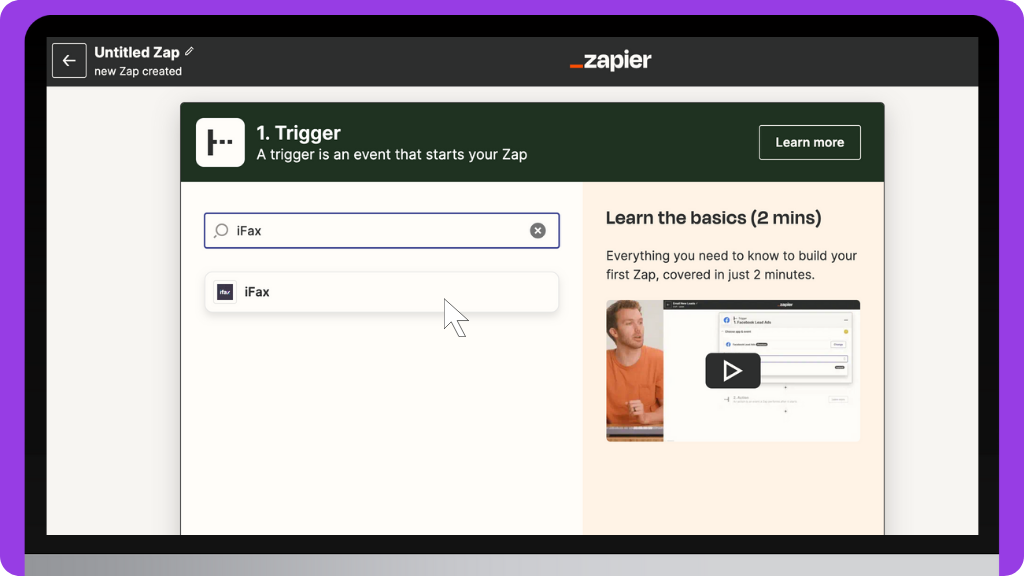
1. Create or log in to your account in Zapier.
2. Start by clicking the Create Zap or Create buttons on the dashboard. This will take you to the Zap editor. Select the trigger application (the app that will trigger the Zap). In this case, you can choose iFax as the trigger app.
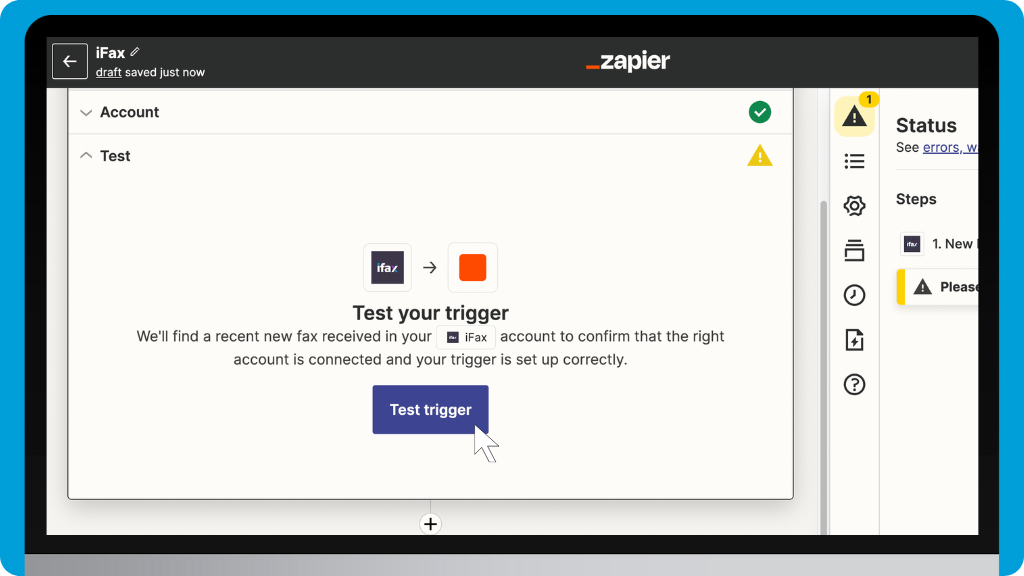
3. Select the trigger event you want to use for your Zap. For example, New Fax Received and New Fax Sent are the supported triggers for iFax integration. If you choose New Fax Received as the trigger event, you can set up a Zap to send you an email whenever you get a new fax.
4. Click Continue. Connect iFax by signing in to your account. This allows Zapier to access your faxes.
5. Click Test triggers to ensure the Zap is connected to your iFax account.
Setting up the action
When you’ve verified that your triggers are correct, click Continue. The next steps are the same as setting up the trigger app. But now, you have to select the action app where you will send the data from the trigger app. In this case, it’s Gmail.
- Select the action events you want to perform with your Zap. The supported action events for Gmail include:
- Add label to an email
- Create a draft
- Create a label
- Send an email
- Remove the label from an email
- Reply to an email
- Find an email
For example, choose Send Email if you want to set up a Zap to send an email when you receive a new fax.
- Click Continue and connect the Gmail account you want to use for the Zap.
- It’s now time to set up the action. Fill out the fields you need. Provide the email subject and the body. Then, click continue.
- After completing these steps, you can test the Zap to ensure it’s working. You must type in the email address to test your action. You can send it to multiple addresses if you need to.
- Once you’ve checked that all the details are correct, turn on the Zap by clicking the Publish Zap button.
- Check the test email in your Gmail account and see if there are any changes you wish to add to your action. If you need to change anything, go back to the Zap editor.
- After publishing your Zap, Zapier will handle the rest. It will automatically send out emails to your clients whenever you receive a new fax.