
💡Note: This feature is available for users in the Professional plan.
Creating a Company Fax Page on iFax allows your clients to send faxes directly to you through a branded online portal, ensuring a smooth and professional experience for both you and your customers. Let’s get started!
Steps to Set Up Your Company Fax Page (WebFax):
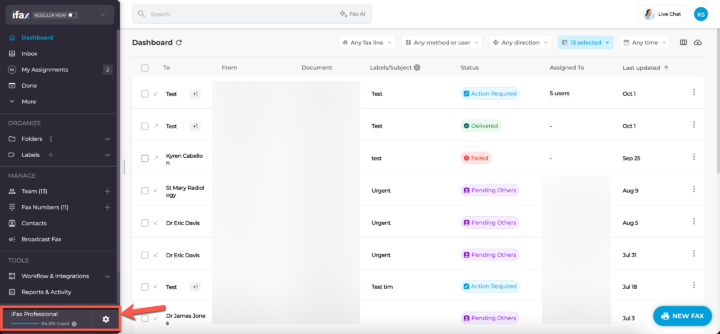
- Open the iFax app and log in to your account.
- Click on the Settings icon ( ⚙️) at the bottom left on the navigation bar
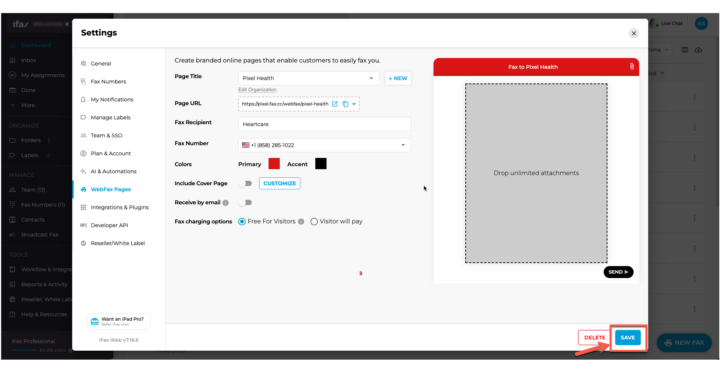
- Click on WebFax Pages
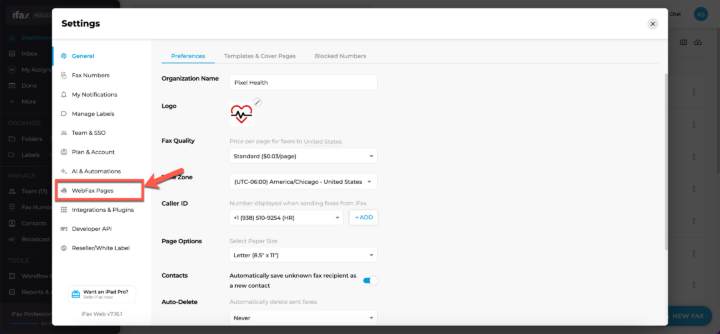
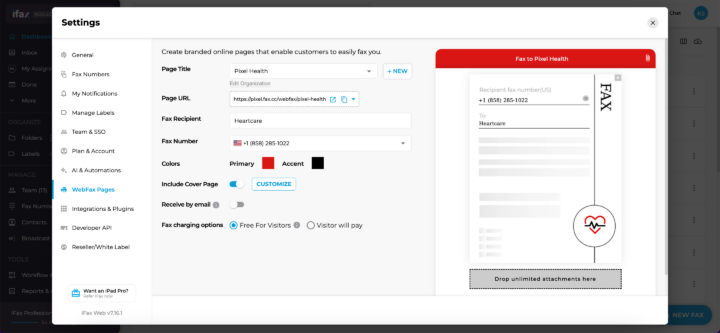
- Personalize your WebFax Page
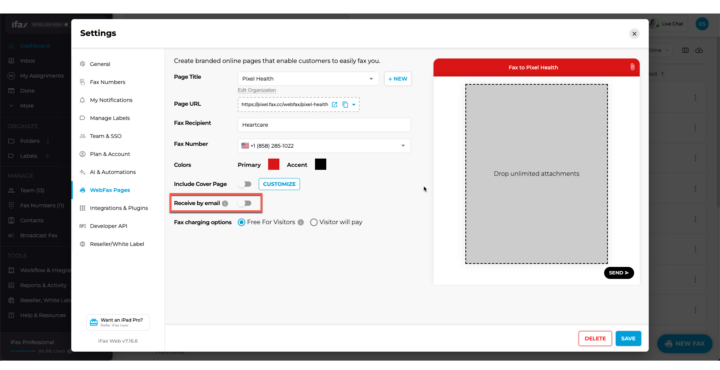
- Page Title: Craft a clear and informative title that tells your customers exactly what this page is for (e.g., “Send Us a Fax”).
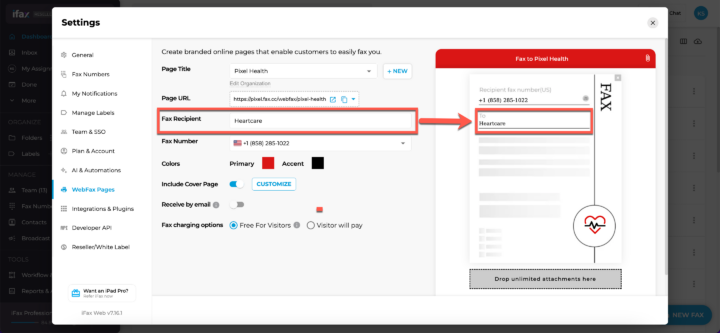
- Fax Recipient: Who will appear as the recipient on incoming faxes? Enter that name here.
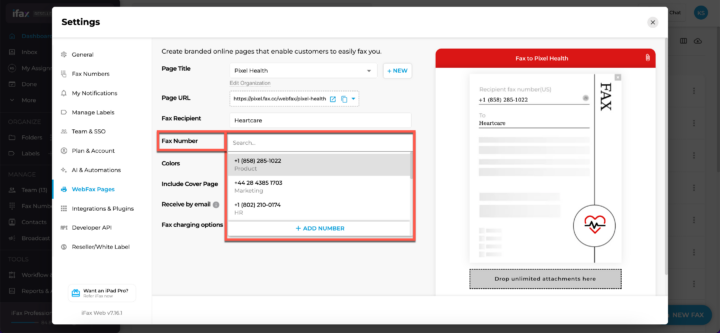
- Fax Number: Enter the fax number you want users to send their faxes to.
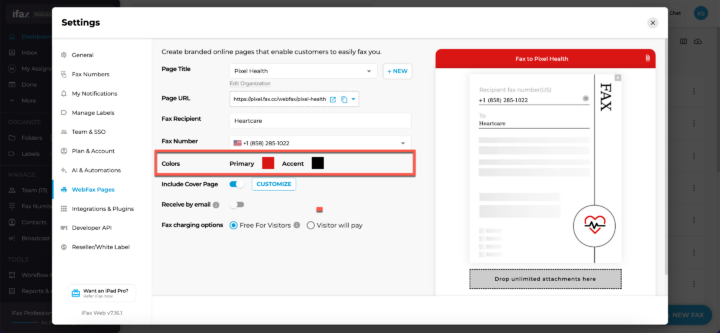
- Colors: Make your page reflect your brand by choosing your Primary and Accent colors. Let your creativity flow!
- Include Cover Page: Do you want to automatically include a cover page with your company information? You can customize the content of the cover page further if you choose to include one. See our guide here: https://www.ifaxapp.com/how-to-add-a-custom-fax-cover-sheet-on-ifax/
- Receive by email: Stay on top of things! Enable this option to receive alerts about incoming faxes via email.
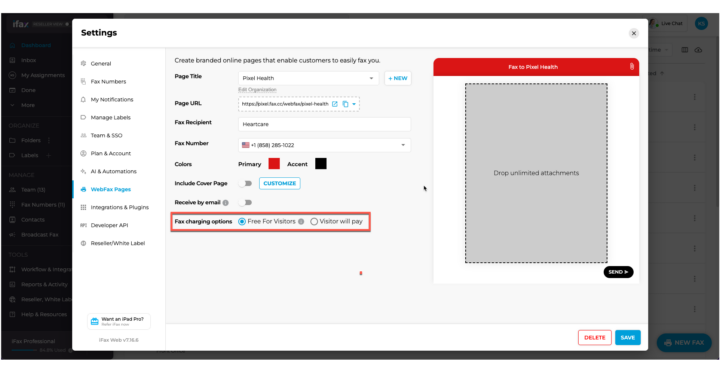
- Fax charging options: This is where you decide who covers the faxing cost: “Free for Visitors” or “Visitors Will Pay.”
Need a more detailed walkthrough on how to Personalize your WebFax page? Here you go!
- Create a New Company Fax Page:
- Click on the +New button to create your new page with the chosen settings.
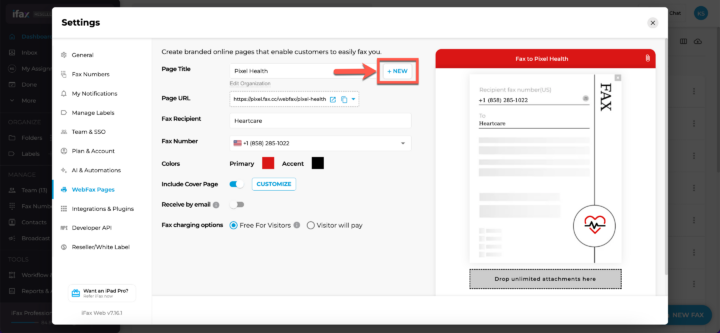
- Click on the +New button to create your new page with the chosen settings.
- Enter Page Details.
- Page Title: Enter a clear and informative title.
- On the Right you’ll see how the Page Title will look to your users.
- Fax Recipient: Enter your name as you’d like it to appear.
- Fax Number: Click the Search bar to choose a registered fax number (one you’ve already purchased or ported to this system) or add a new one. Adding a new number will open a pop-up window where you can port a new or existing number. For detailed instructions, please refer to the following:
- Porting a New Fax Number: https://www.ifaxapp.com/how-to-port-a-new-fax-number/
- Porting an Existing Number: https://www.ifaxapp.com/how-to-port-over-an-existing-number/
- Page Title: Enter a clear and informative title.
- Customize Colors
-
- Click on the colored boxes to choose your Primary and Accent colors to match your brand.
- You can use the color picker or enter specific hex codes.
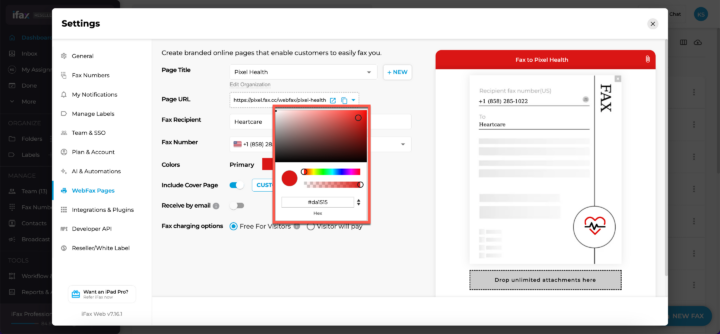
- Click anywhere outside of the color picker to choose your Accent color next. Repeat 10-11.
- Click on the colored boxes to choose your Primary and Accent colors to match your brand.
-
- Include a Cover Page (Optional). For a more detailed guide on customizing your cover page, refer to the guide here: https://www.ifaxapp.com/how-to-add-a-custom-fax-cover-sheet-on-ifax/
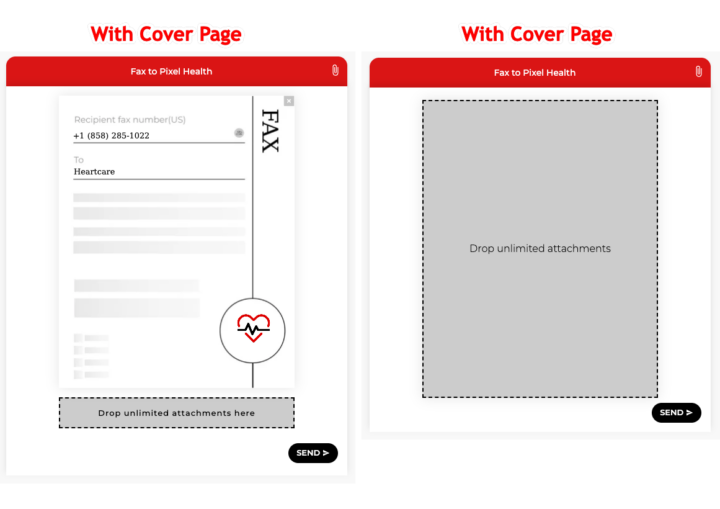
- Toggle the Include Cover Page option and click Customize to further personalize it (e.g., logo, HIPAA badge, template selection).

- Customize your fax cover page by enabling or disabling the following elements:
- Logo: Add your organization’s logo to enhance brand recognition and professionalism.
- HIPAA Badge: Display the HIPAA badge if your organization is HIPAA-compliant. This demonstrates your commitment to protecting patient health information and can build trust with clients and partners in the healthcare industry.
- HIPAA Disclaimer: Add a HIPAA disclaimer if you handle or transmit protected health information (PHI). The disclaimer should inform recipients that the fax contains PHI and that it is subject to HIPAA confidentiality requirements. This helps protect patient privacy and demonstrates your compliance with HIPAA regulations.
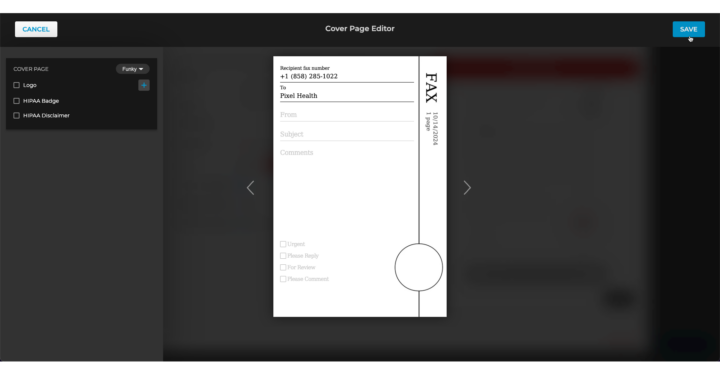
- Check all the boxes you want displayed on your Cover Page. Don’t forget to click SAVE!

- Toggle the Include Cover Page option and click Customize to further personalize it (e.g., logo, HIPAA badge, template selection).
- Receive Alerts by Email
- Toggle Receive by Email on or off depending on your preference for receiving document attachments via email.
- Toggle Receive by Email on or off depending on your preference for receiving document attachments via email.
- Choose Fax Charging Options
- Choose whether your customers/users will pay when they fax you or if it’s free (deducted from your plan’s allowance).
- Choose whether your customers/users will pay when they fax you or if it’s free (deducted from your plan’s allowance).
- Once you’re satisfied with your Company Fax Page, click the Save button located at the bottom right.
Now you have a professional and convenient way for your clients to send faxes directly to your business using iFax! 🎉
If you have any questions or need further assistance, please reach out. We’re here to help! Thanks for choosing iFax. ❤️