
 Tailor your fax settings to match any business process
-
Deliver sharp, high-quality faxes with advanced fax controls
-
Strengthen your brand with every fax you send

Enjoy iFax services at 50% off!
Your discount will be applied during checkout.
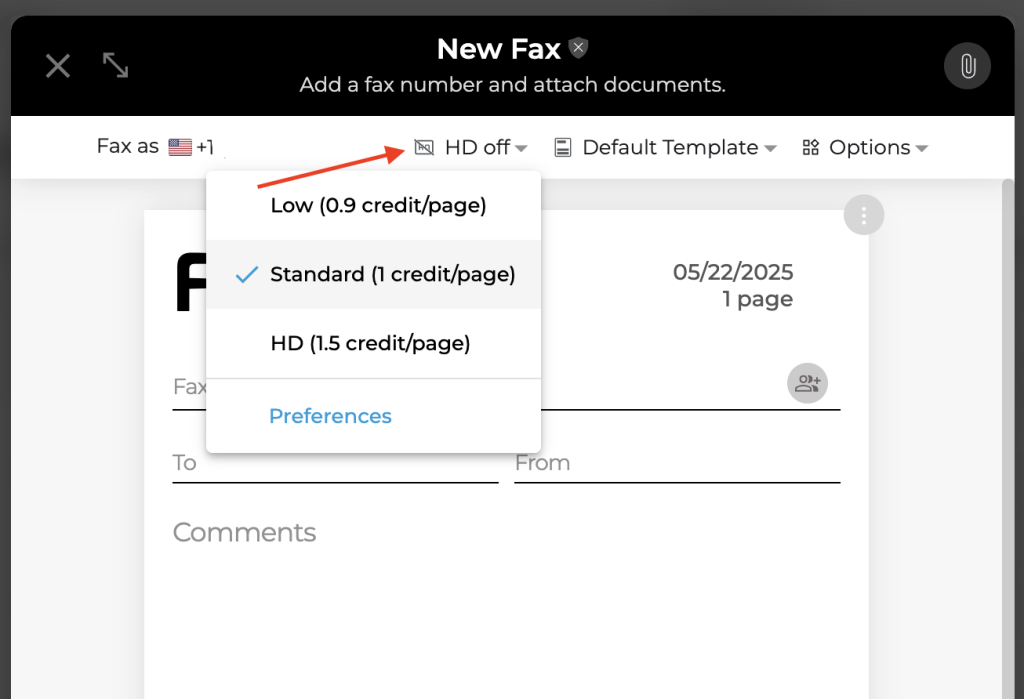
You don’t have to stress over blurry images or unreadable texts. Here’s how to improve the quality of your faxes using online fax configuration:
Note: Adjusting the fax image quality may incur additional charges. Prices may vary depending on the recipient’s country.
iFax allows you to send business faxes that match your existing branding by uploading your logo.
Here’s how to do it:
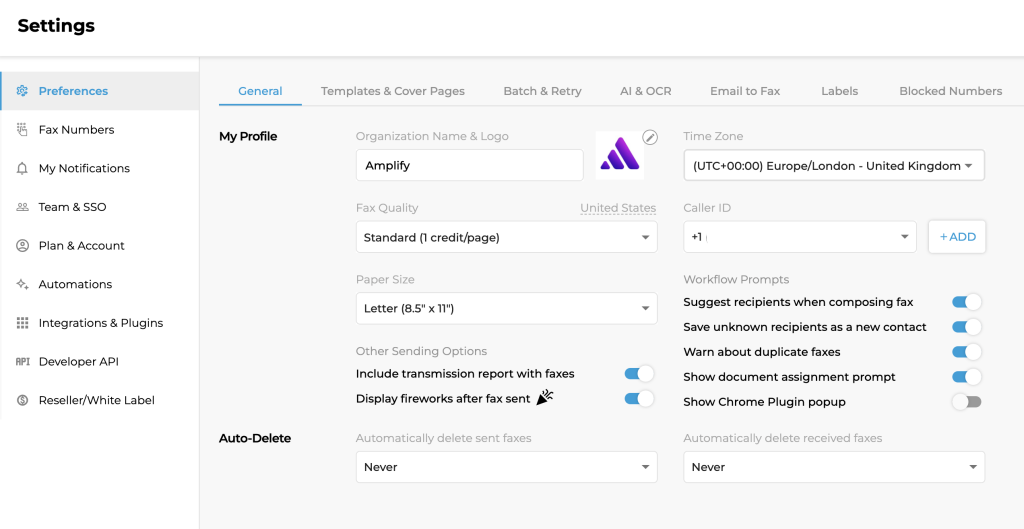
Note: From there, you can also set up your preferred fax settings (paper size, time zone, caller ID, sending options, workflow prompts, etc).
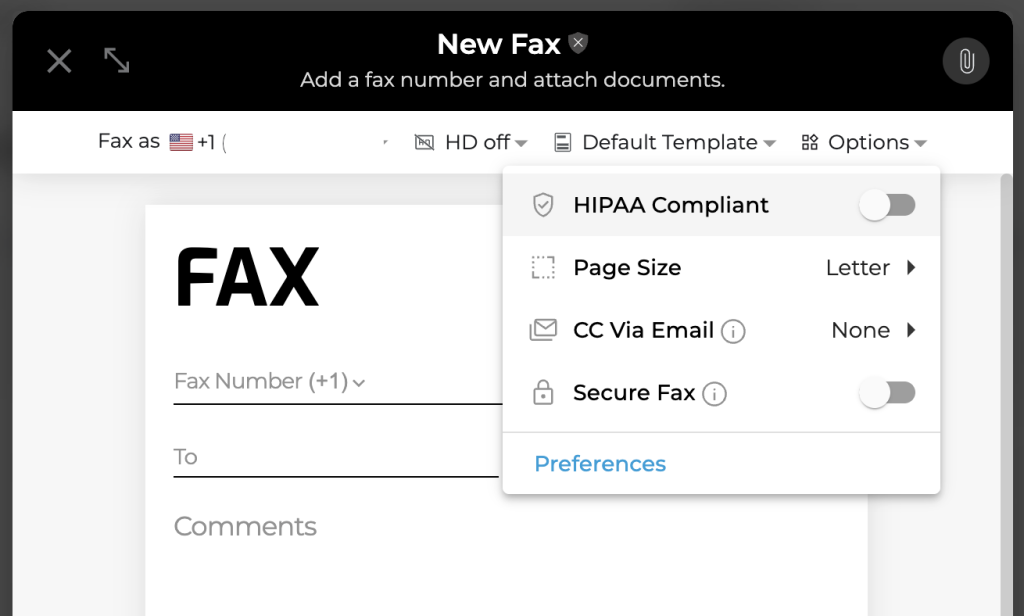
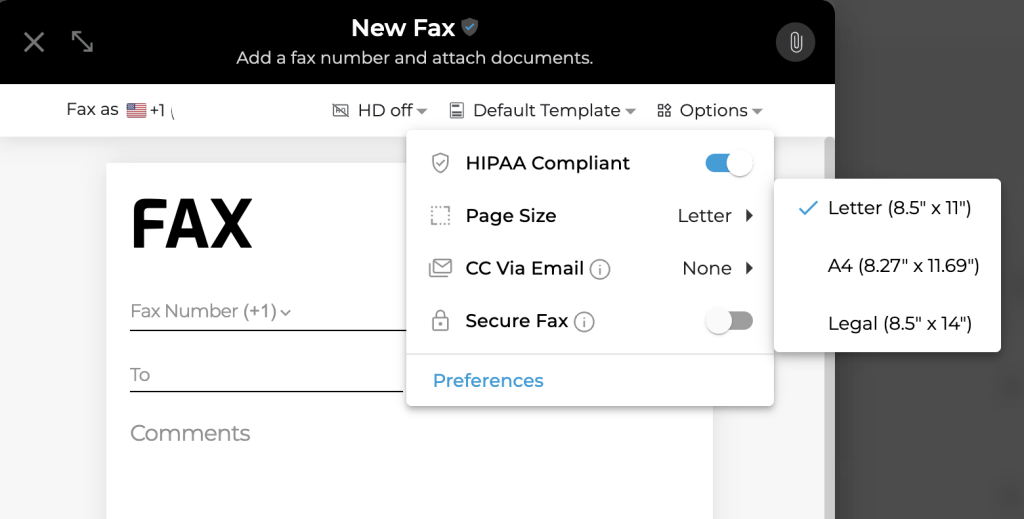
Alternatively, you can set the page size of your faxes right as you create them. Picking the right format upfront helps maintain proper layout and readability.
iFax will automatically save the changes you made to your fax settings.
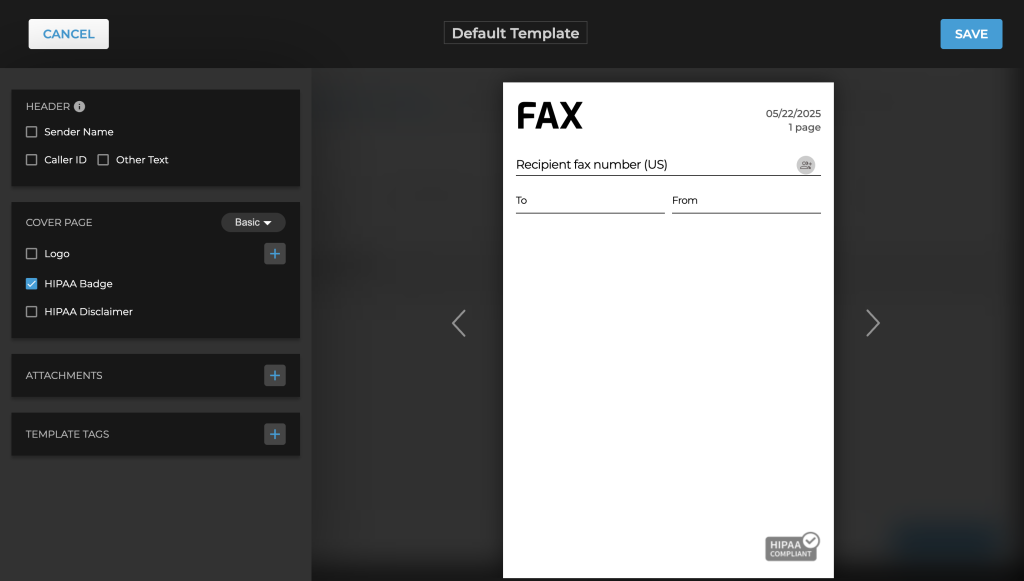
By default, the iFax app will include a default fax cover letter page in your fax message. If you want to set your preferred default cover page with pre-filled business details, here’s what you need to do:
A transmission receipt serves as proof that your fax has been successfully delivered. With iFax, you can update your fax configuration to include transmission receipts on every email confirmation message.
Here’s how it works:
