
 Add and remove members in just a few clicks
- Assign fax numbers, set permissions, and manage roles
- Empower team collaboration with faxing capabilities
Enjoy iFax services at 50% off!
Your discount will be applied during checkout.
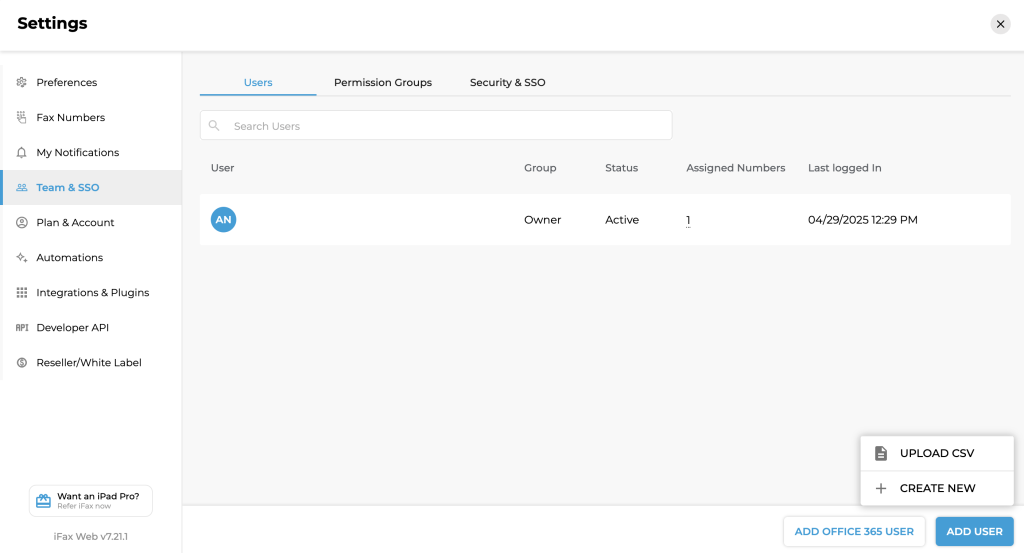
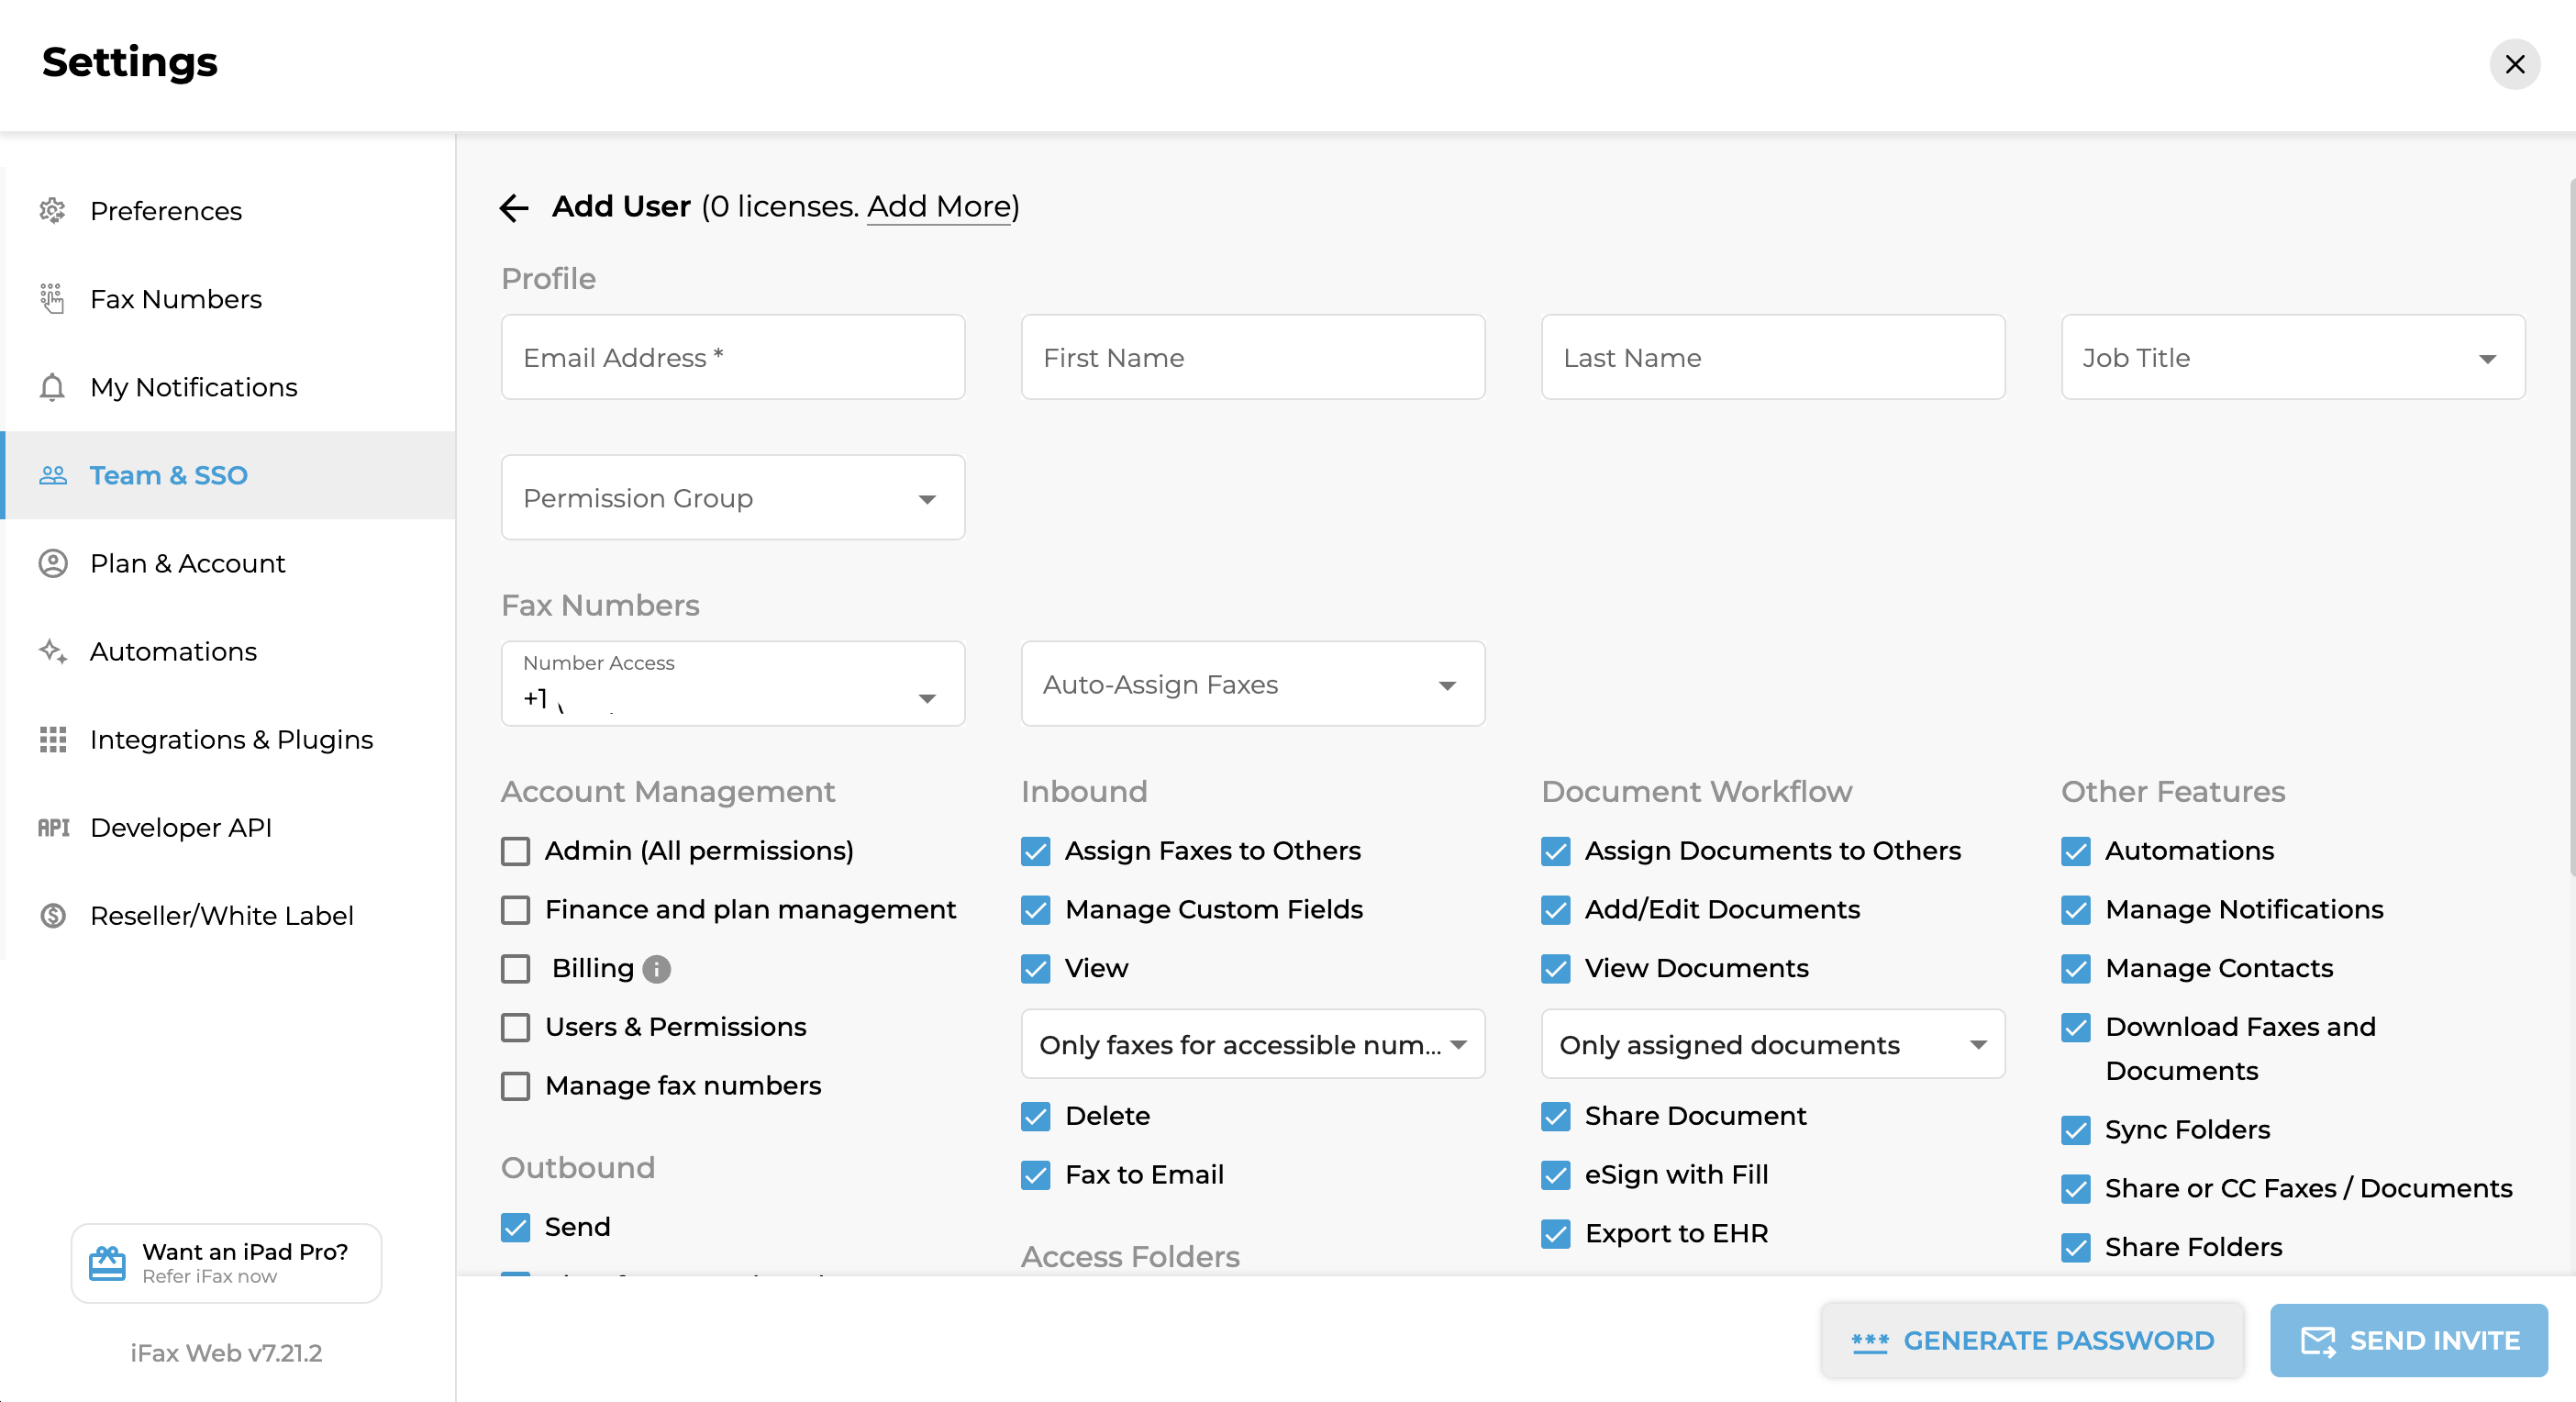
Assign user-specific roles and permissions. Easily add, remove, and modify user access, making it easier to scale up or down based on your current faxing needs or operational demands.
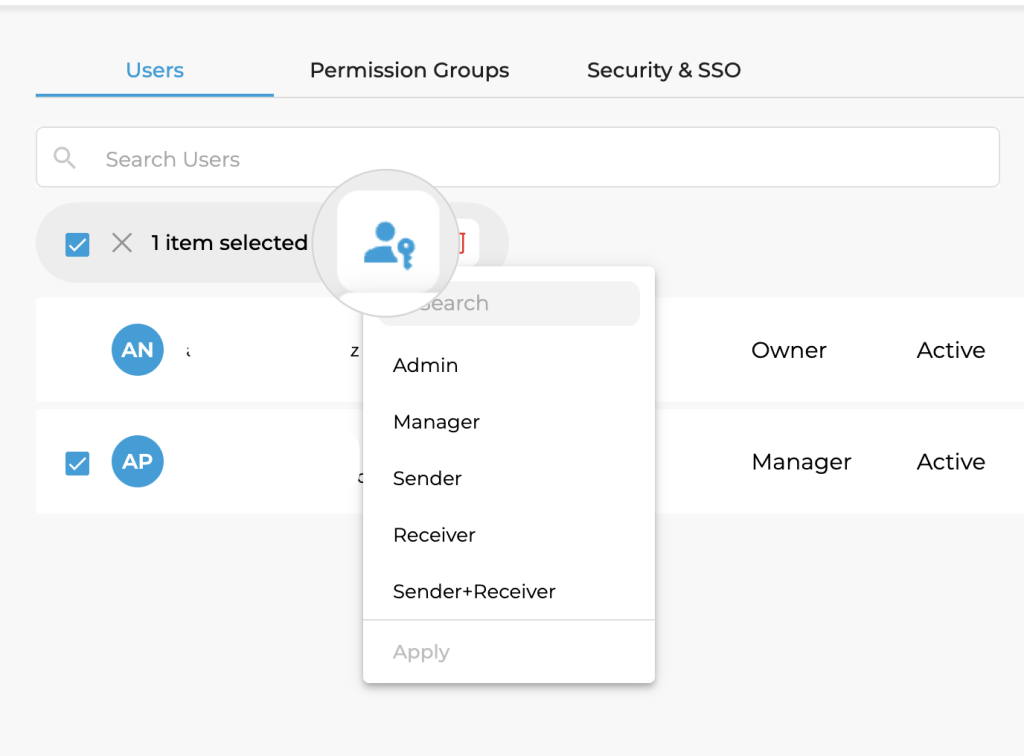
By default, the role assigned will automatically set the permissions allowed for each user. However, you can update these roles provided you have administrator access.
To do so, all you need to do is follow these steps:
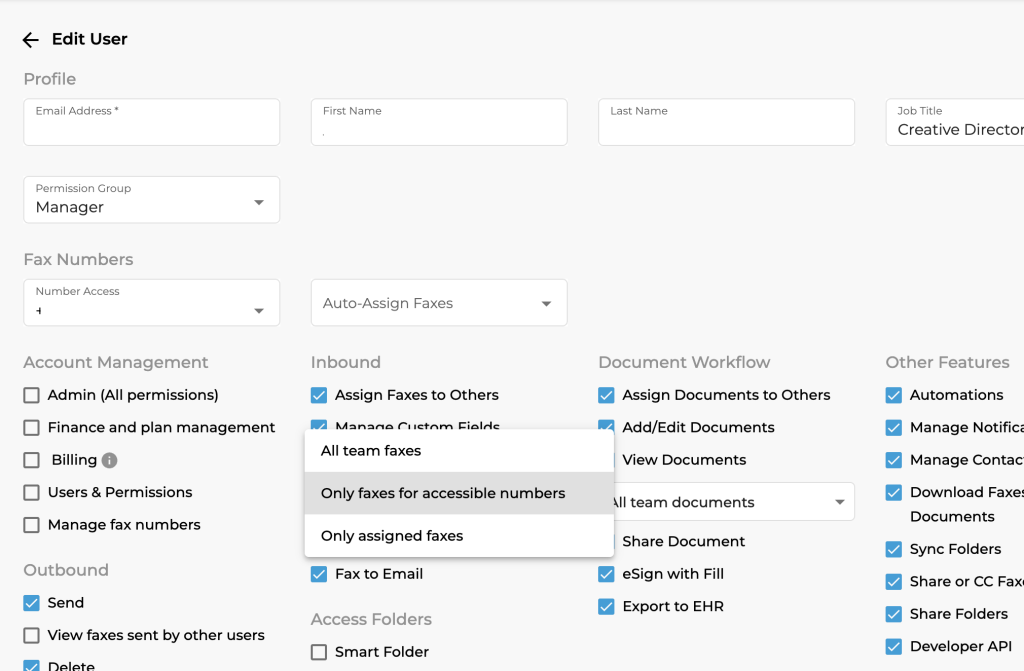
For users with access to inbound faxes, you can limit the type of faxes they can see and only grant access to faxes relevant to their department or role.
Here’s how to do it:
Note: The user’s access number and assigned fax numbers may differ. Always double-check the selected options to avoid errors and confusion.
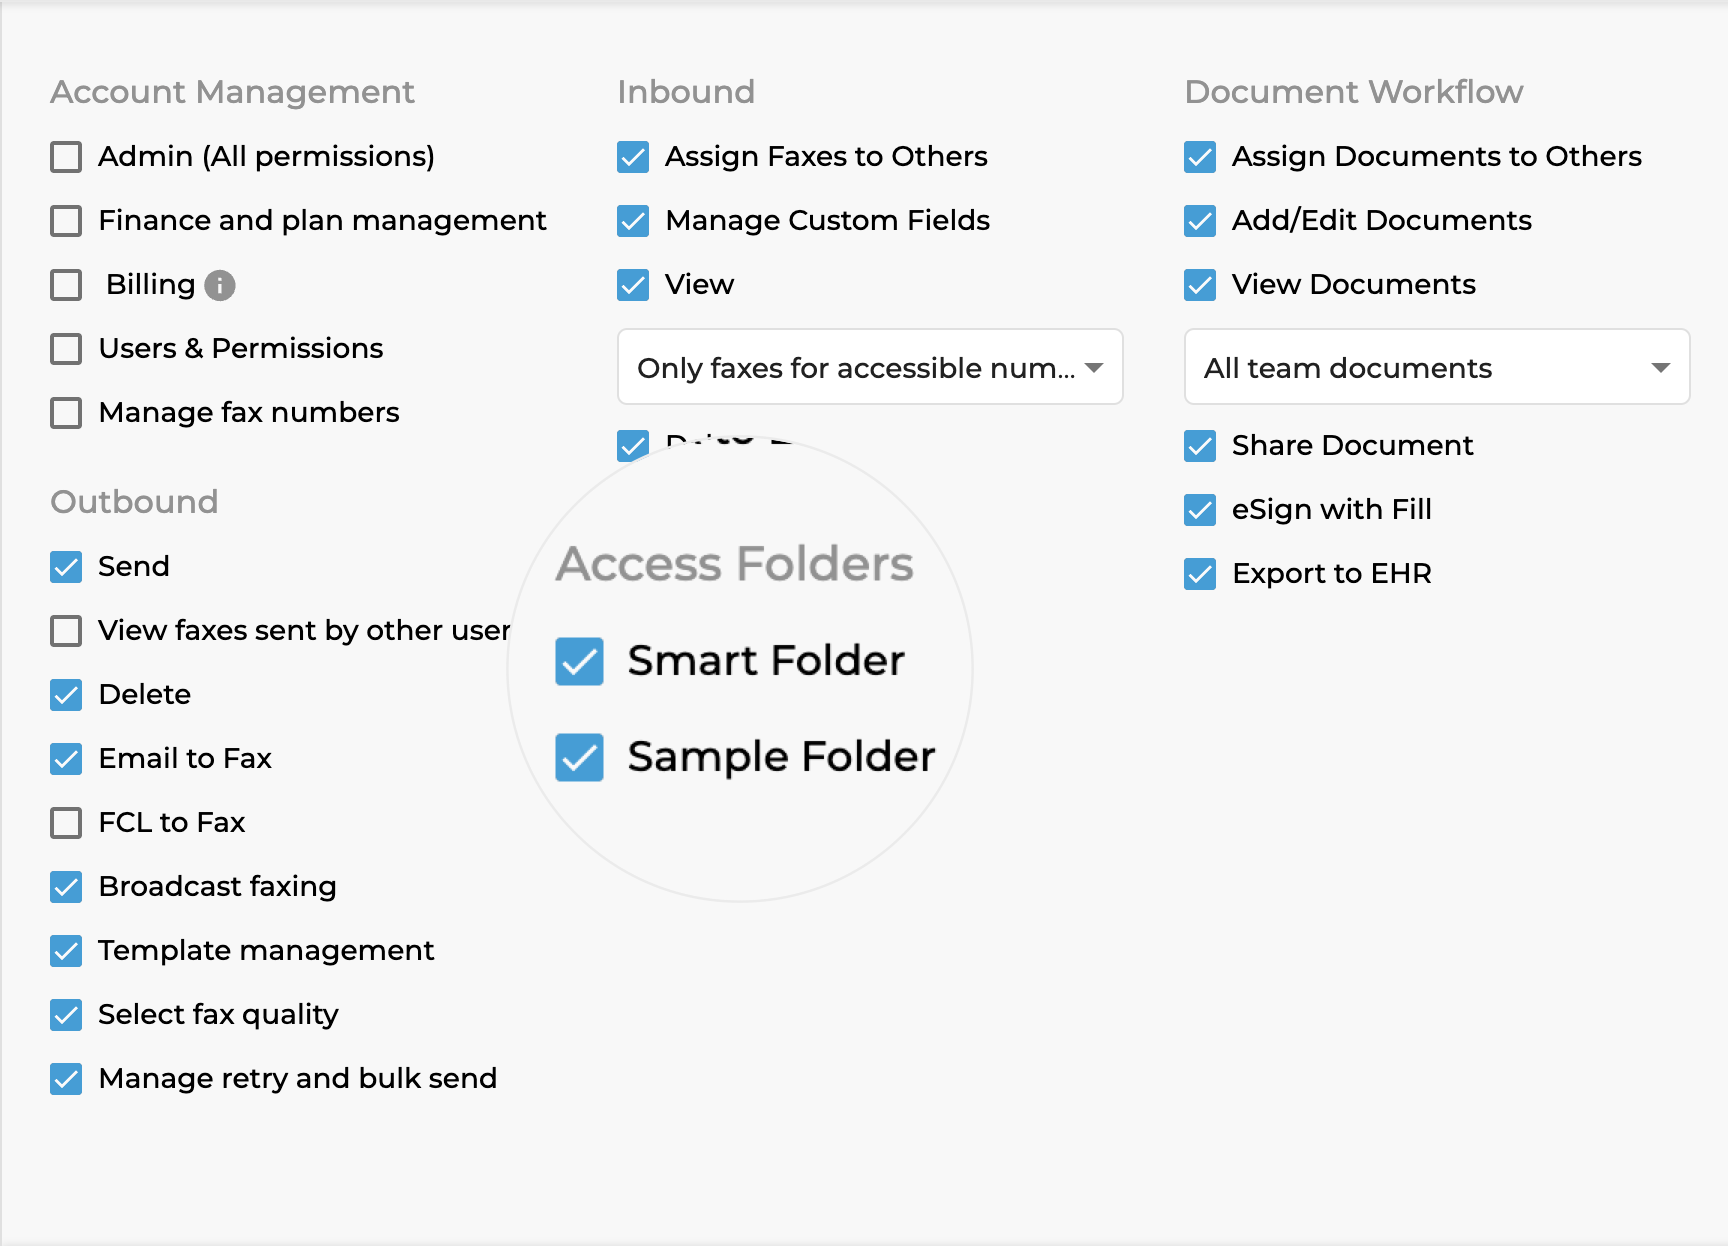
Meeting the specific needs of various user and group roles within your organization has never been easier. Just tick the box next to a folder to grant instant access.
iFax’s advanced team management features make granting access permissions to specific folders easier and more streamlined, enhancing data security and improving overall user experience.
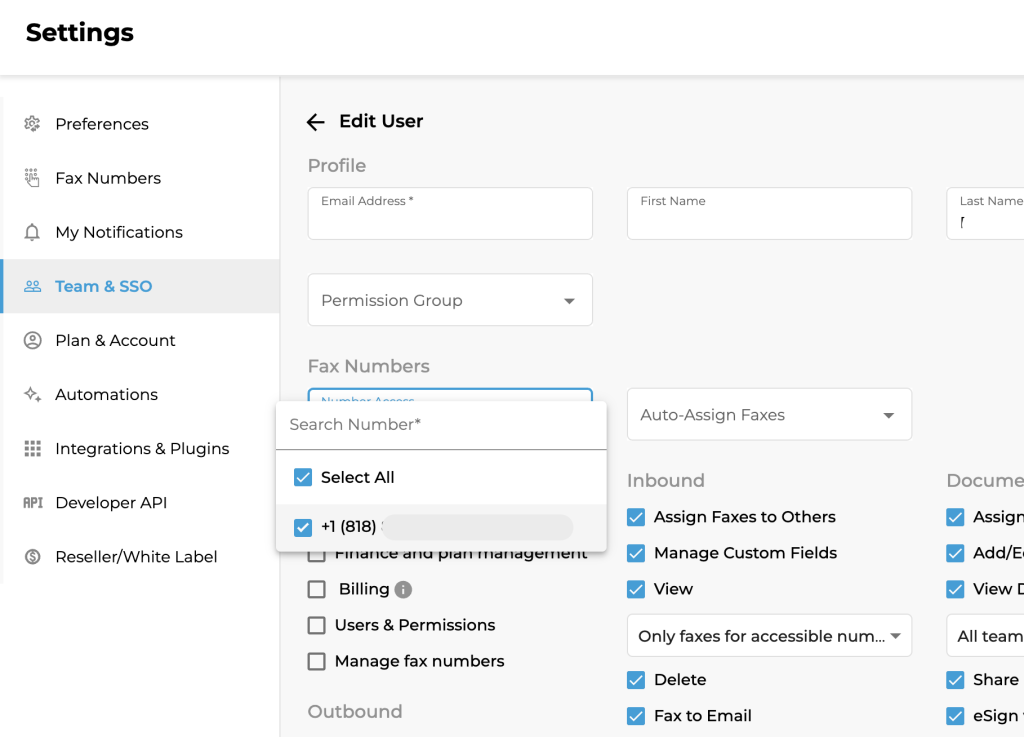
With the iFax fax user management feature, you can also assign specific numbers to each user. Doing so is ideal, especially if your business or organization has multiple departments or teams.