
You can now send a fax directly from your scanner using the iFax – Scan & Print to Fax feature.
This option lets you scan physical documents and attach them instantly to your fax — no need to upload files manually.
Step 1: Open iFax: Scan & Print to Fax
Step 2: Select Your Scanner
The Scanner dropdown displays all available scanner devices connected to your system.
-
Choose your preferred scanner.
-
Once selected, you’ll see a live Scan Preview window.
Step 3: Start Scanning and Review Preview
Click Start Scan to begin scanning your document.
Once completed, a preview of the scanned image will appear.
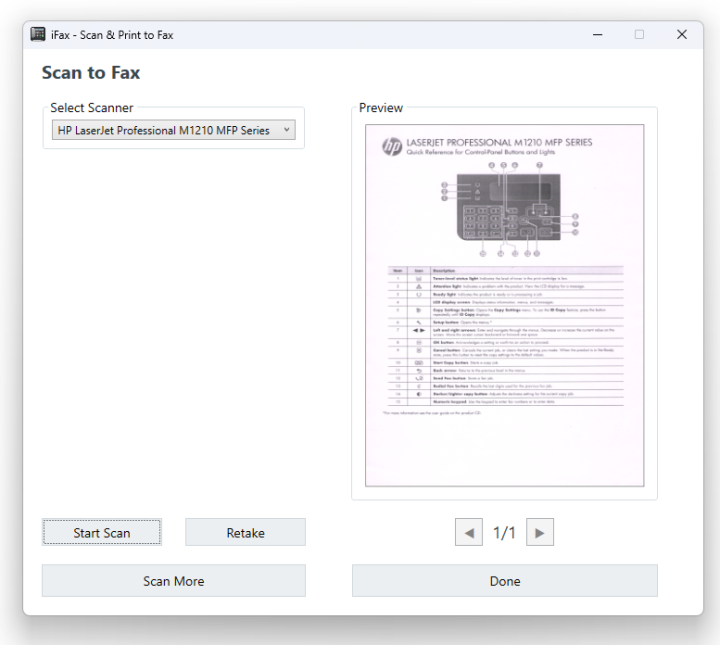
From here, you have a few options:
-
Retake: Replace the current scanned image with a new one.
-
Scan More: Add more pages to your existing scanned batch.
-
Done: Combine all scanned pages and send them to the Print to Fax driver.
Step 4: Review and Send the Fax
After clicking Done, the scanned file will automatically attach to your fax composer window in iFax.
-
Review the document and recipient details.
-
Click Send Fax to deliver your scanned fax instantly.
You’ll receive a confirmation once the fax has been sent successfully.
Why Users Love iFax – Scan & Print to Fax
-
Integrated within the Print to Fax driver.
- Scan and send a fax directly — no separate upload needed.
-
Preview and retake scanned pages before sending.
-
Add multiple pages easily using Scan More.
-
Secure and seamless faxing workflow.