
SEND
Enjoy iFax services at 50% off!
Your discount will be applied during checkout.
From creating an efaxing account to setting up an efax number, this guide covers all the efax setup basics you need to send and receive electronic faxes.
Efax (electronic fax) replaces bulky hardware and phone lines. It pertains to sending and receiving faxes through the Internet.
Electronic fax lets you send documents and images electronically, converting them into fax formats. If the recipient receives the efax from a fax machine, it prints out like a regular fax. This modern process makes faxing faster, simpler, and more streamlined.
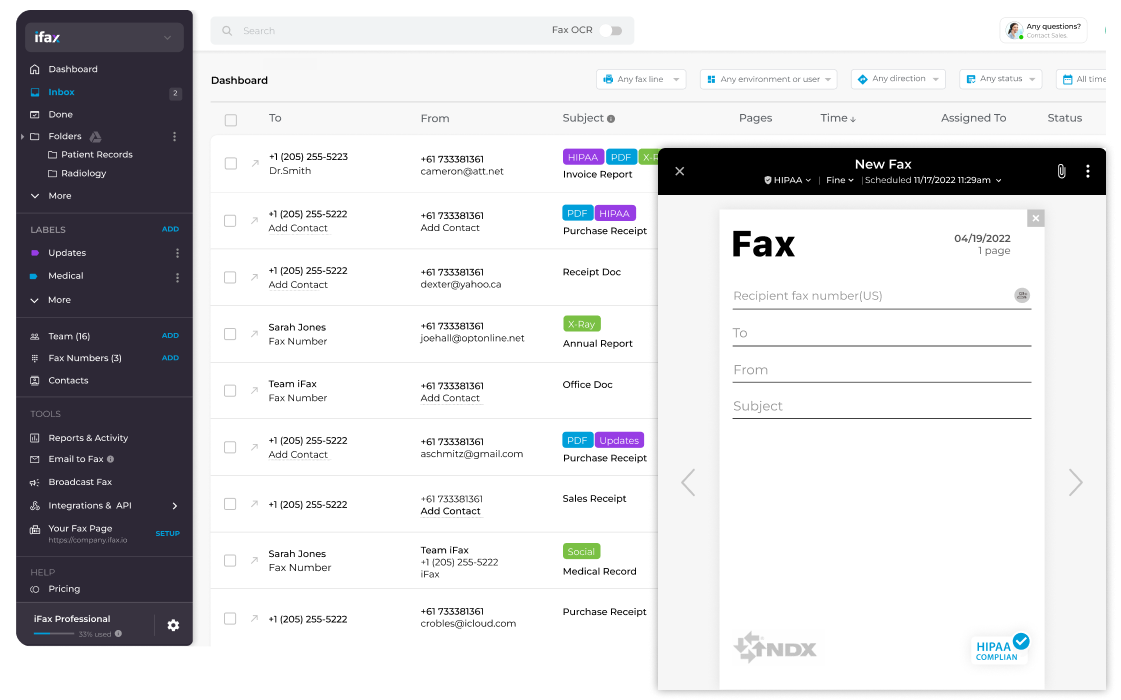
From the send new efax window, key in or enter the complete efax number of the contact you wish to send the fax to.
You can add the documents (PDF or Word) or image files directly from your local drive or import them from your cloud storage.
Proceed with sending the efax by clicking the Send button. Confirm its transmission status by checking your email or app notification.

Enter a valid email address to sign up for an account. For efax login, you can use an existing Google, Microsoft, or company email address.
Note: This guide is for how to create an efax account with iFax, an electronic fax solution that works on computers, phones, and other devices connected to the Internet.
A trial account lets you access all paid and premium electronic fax features for 7 days, providing sufficient time to try and evaluate the service.
Once the trial ends, you can continue using the service by choosing an efaxing plan that best aligns with your usage requirements. Consider your average daily and monthly fax volumes and whether you need to set up different efax numbers, company fax pages, and team accounts.
Getting started with how to set up an efax number, you can get a new one or port the number from your previous provider. iFax lets you set up an efaxing number in the United States, the United Kingdom, Canada, Germany, France, and Italy. Indicate the area and 10-digit number you want and click Add Number to confirm.
When porting an existing number, you need an active efaxing account with your current provider.
Go to your account’s fax dashboard, navigate to settings, and set up your desired efaxing preferences like profile name, document options, workflow prompts, email to fax, and auto-delete options.
Create and save efax templates for different document types and effortlessly fax according to your specific needs.


Getting started with electronic faxing on a computer is easier than the traditional fax method.
With iFax, here’s how to set up efax on computers:
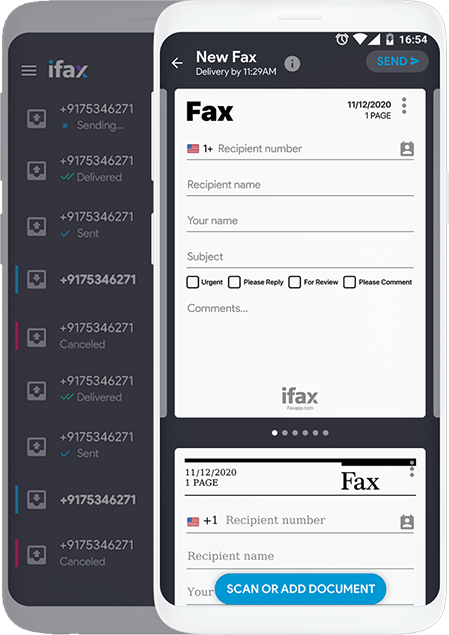
Electronic fax lets you efax on the go using your phone or any device, taking your faxes with you. Here’s how to set up efaxing on your phone:
You can track your outgoing and incoming faxes in real time through email and mobile app notifications.
Learn how to set up efax in Outlook, Gmail, Yahoo Mail, and other email platforms. Send efaxes directly from your email client or app without the complicated setups.
Learn how to set up an efax for free online without any complex hardware setup or additional software. It’s quick and efficient, making it easier for you to get started.
Frequently Asked Questions About Efax Setups
Before anything, there are certain things you need to fulfill to ensure a seamless efax setup process. Doing so will prevent delays or problems during the setup process.
Here’s a quick rundown on what you need to prepare before proceeding with the actual electronic fax setup process:
One way to avoid failed faxes and other common efaxing issues is to test your efax account setup before sending a critical document or faxing documents in batches.
Here are some key things to consider during testing:
For problems related to account limits, failed faxes sent using email, and other errors, it’s best to contact the support team for assistance and detailed troubleshooting.